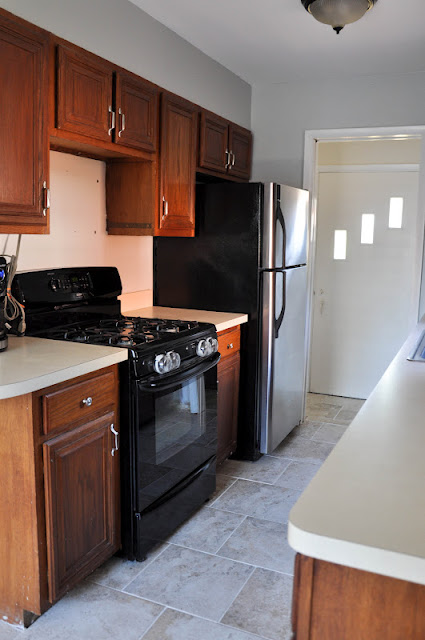
This is our kitchen as it had looked since we moved in seven years ago:

Notice the vinyl flooring, celery green walls, laminate countertops, black and stainless appliances, black light fixtures, and worn cherry cabinets. All of those details are ones we would love to change, but to do it all would be too costly of an investment. In the next year or so we plan to rent this home out and buy another slightly larger house to live in. In the meantime we do want to make the home appealing to renters, durable for the long term, and more pleasant for ourselves.
It's not obvious in the before pictures, but the vinyl flooring was discolored, peeling up on some edges, and had holes. Seven years ago, we put replacing that floor on "the list," and it finally reached the top.
Although he had never done tile before, Mike did an incredible job with this project and reminded me of his offspring with his "I do it myself" approach. Aside from making design decisions, my role was just to keep the kids out of the way and prepare meals without stepping on wet grout. Mike enjoys this kind of work, hopes to do more of it in the future, and wants to get the full experience of each new project.
When the removal of all the previous layers of flooring took much longer than anticipated, complete with a hazmat scare (I'll explain below), we embraced the fact that this fix-up was going to take weeks rather than a long weekend--weeks of Mike still working full time and then some, parenting twin two-year-olds, and a vacation in the middle of it all.
Below is a picture Mike took that reveals several of the layers he had to pull up. After spending hours and hours and hours pulling up vinyl and plywood and vinyl and plywood in order to get to the subfloor, he was faced with a layer of black foamy goo. Under that was a layer of harder tile. He was about 2/3 of the way through the black goo and hard tile layer when I looked out into the kitchen and recognized the tile as the kind you see in schools and basements built in the 1950's, the kind that often contains asbestos and that is best to leave alone.
In a panic, we Googled like maniacs and found that we were right to be concerned. We bought an air cleaner, plastic sheeting to cover the doorways to the kitchen, a full-body jumpsuit for Mike, and an air mask that looked like it would protect him on a World War I battlefield, all just before Home Depot closed for the night. Mike worked until with wee hours of morning ridding our house of the remaining flooring of doom.
Still, we were terrified for our family's health, and following the hugely precautious advice we found online, we took samples of our tile and that black goo to a lab for testing. To our relief, there was no asbestos in the material. The home improvement lesson we learned from this was if the floor was put down before the mid-1980's, get a small sample tested before you begin any removal. Although it wasn't part of our project, we also learned that popcorn ceilings and insulation are even more potentially hazardous than tile and should also be tested and probably removed by professionals only. There are laws about this that we could have been breaking had our material tested positive. This kind of thing is apparently a common mistake, but that didn't make us feel much better. Happily, that is all behind us now.
There are certainly more projects to complete in this kitchen fix-up, but as of this morning, the floor is officially done!
Before:
After (with other phases on the way):
Still on the kitchen fix-up to-do list:
replace crown and floor molding
gel stain the cabinets darker
replace cabinet handles and drawer pulls
paint an old round kitchen table and small cabinet for the eating area
decorate with midcentury-modern and aqua details
sew patio cushion covers
The floor was really the only improvement to the kitchen that we felt we must do, but while we're at it we figured we would do a few other things. The poorly installed molding that had been in the kitchen has always bugged Mike, and I love a chance to pretend I'm the next HGTV Design Star.


No comments:
Post a Comment